Inviting your team: accounts, roles, groups and seats
In groupforce an administrator adds people directly: you create the account, choose a role, and hand over a first password. This guide covers that whole path, plus the seat limit that decides how many people you can add, groups, resetting passwords, and what the four account states mean. You need to be a workspace administrator; everything below is in Workspace settings, which only administrators see in the dock.
groupforce does not send an invitation e-mail. Creating an account sends nothing to the person, so tell them yourself: the address (https://<workspace>.groupforce.org), the workspace name, their login and the initial password. Give the password privately.
1. Check your seats first
Your plan includes a number of seats, and an account takes one while it is Active. When every seat is used, adding another person is refused with "the seat limit is reached: your plan has N seats. Add seats in the billing console". It is a hard stop: nothing is queued and nothing is added on credit.
- Only Active accounts count. People you mark Inactive, Deactivate or Delete stop using a seat.
- If a workspace's subscription has ended (read-only) no accounts can be added at all, and if it is suspended the message says the subscription needs attention.
- To add seats, sign in at console.groupforce.org and open Plan and seats. The page shows "N in use · M bought". More seats start immediately and are charged for the part of the period that is left, and the page previews the amount before you confirm. Fewer seats take effect at renewal, and you cannot go below the number in use.
Prices and how billing works are in Paying for groupforce.
2. Add a person
Open Workspace settings. People is the first tab. Click Add user and fill in the dialog:
| Field | Rule |
|---|---|
| Full name | Required. |
| Login | Required. 2 to 63 characters: letters, digits, ., _, - and @, and the first one a letter or digit. Logins are what people type to sign in. |
| The dialog does not mark it required, but the account is refused without a valid address. | |
| Initial password | Required, 8 to 72 bytes. The eye icon shows what you typed. The dialog empties itself each time it opens. |
| Administrator (can manage users) | A checkbox. Leave it off for a member. |
Click Add user. The person appears in the list and can sign in straight away. If your workspace has a default group (see below) they join it automatically.
Creating an administrator is two steps behind the scenes: the account is made first, then given the role. If the second step fails you are told so, and the account exists as a member; open it and switch the role on from its Overview tab.
3. Roles
There are two roles in practice. A member works in the apps. An administrator also sees Workspace settings and can manage people, groups, statuses, tags, printing templates and installed apps. The list shows each person's role as an "Administrator" or "Member" label.
To change a role, select the person, open Overview and use the Role switch. A workspace must always keep at least one active administrator: deactivating, marking inactive or demoting the last one is refused. Projects also have their own finer roles, which are set inside Projects, not here.
4. Groups
A group is a named set of people. Groups can be given work, and they own shared things: an address book, a calendar and, optionally, a folder in Documents. Open the Groups tab, click the + button ("New group"), and give it a name and description.
| Part of a group | What it does |
|---|---|
| Members | Add or remove people with the picker. Only Active accounts can be members. |
| Delegates | People who may add and remove that group's members without being administrators. A delegate gets a Groups window of their own, listing the groups they manage and showing members only. |
| Permissions | Four switches: whether members may add contacts, change and delete any contact, add events, and change and delete any event in the group's address book and calendar. |
| Documents | A switch for the group's shared folder. Turning it off hides the folder in Documents but keeps its files. |
| Default group | Make default puts every new account into that group automatically ("Every new account joins this group automatically"). |
| Usage | How many work items, projects, notes, contacts, events and files point at the group. A group cannot be deleted while anything does. |
You can also put a person in groups from their own entry: People → the person → Access → Member of.
5. Passwords
- The person changes it themselves: account menu → Settings → Password. They enter the current one and a new one (8 to 72 bytes), and all their sessions end.
- You set a new one: select the person and click Reset password, type a new password (at least 8 characters) and confirm. No current password is needed. They are signed out everywhere, including any personal access tokens they had, and the old password stops working at once.
- groupforce does not make the person choose a new password after a reset, and the sign-in screen has no "forgot password" link, so a reset by an administrator is the way back in for someone who is locked out. Tell them to change it under Settings.
6. Status: pausing and removing people
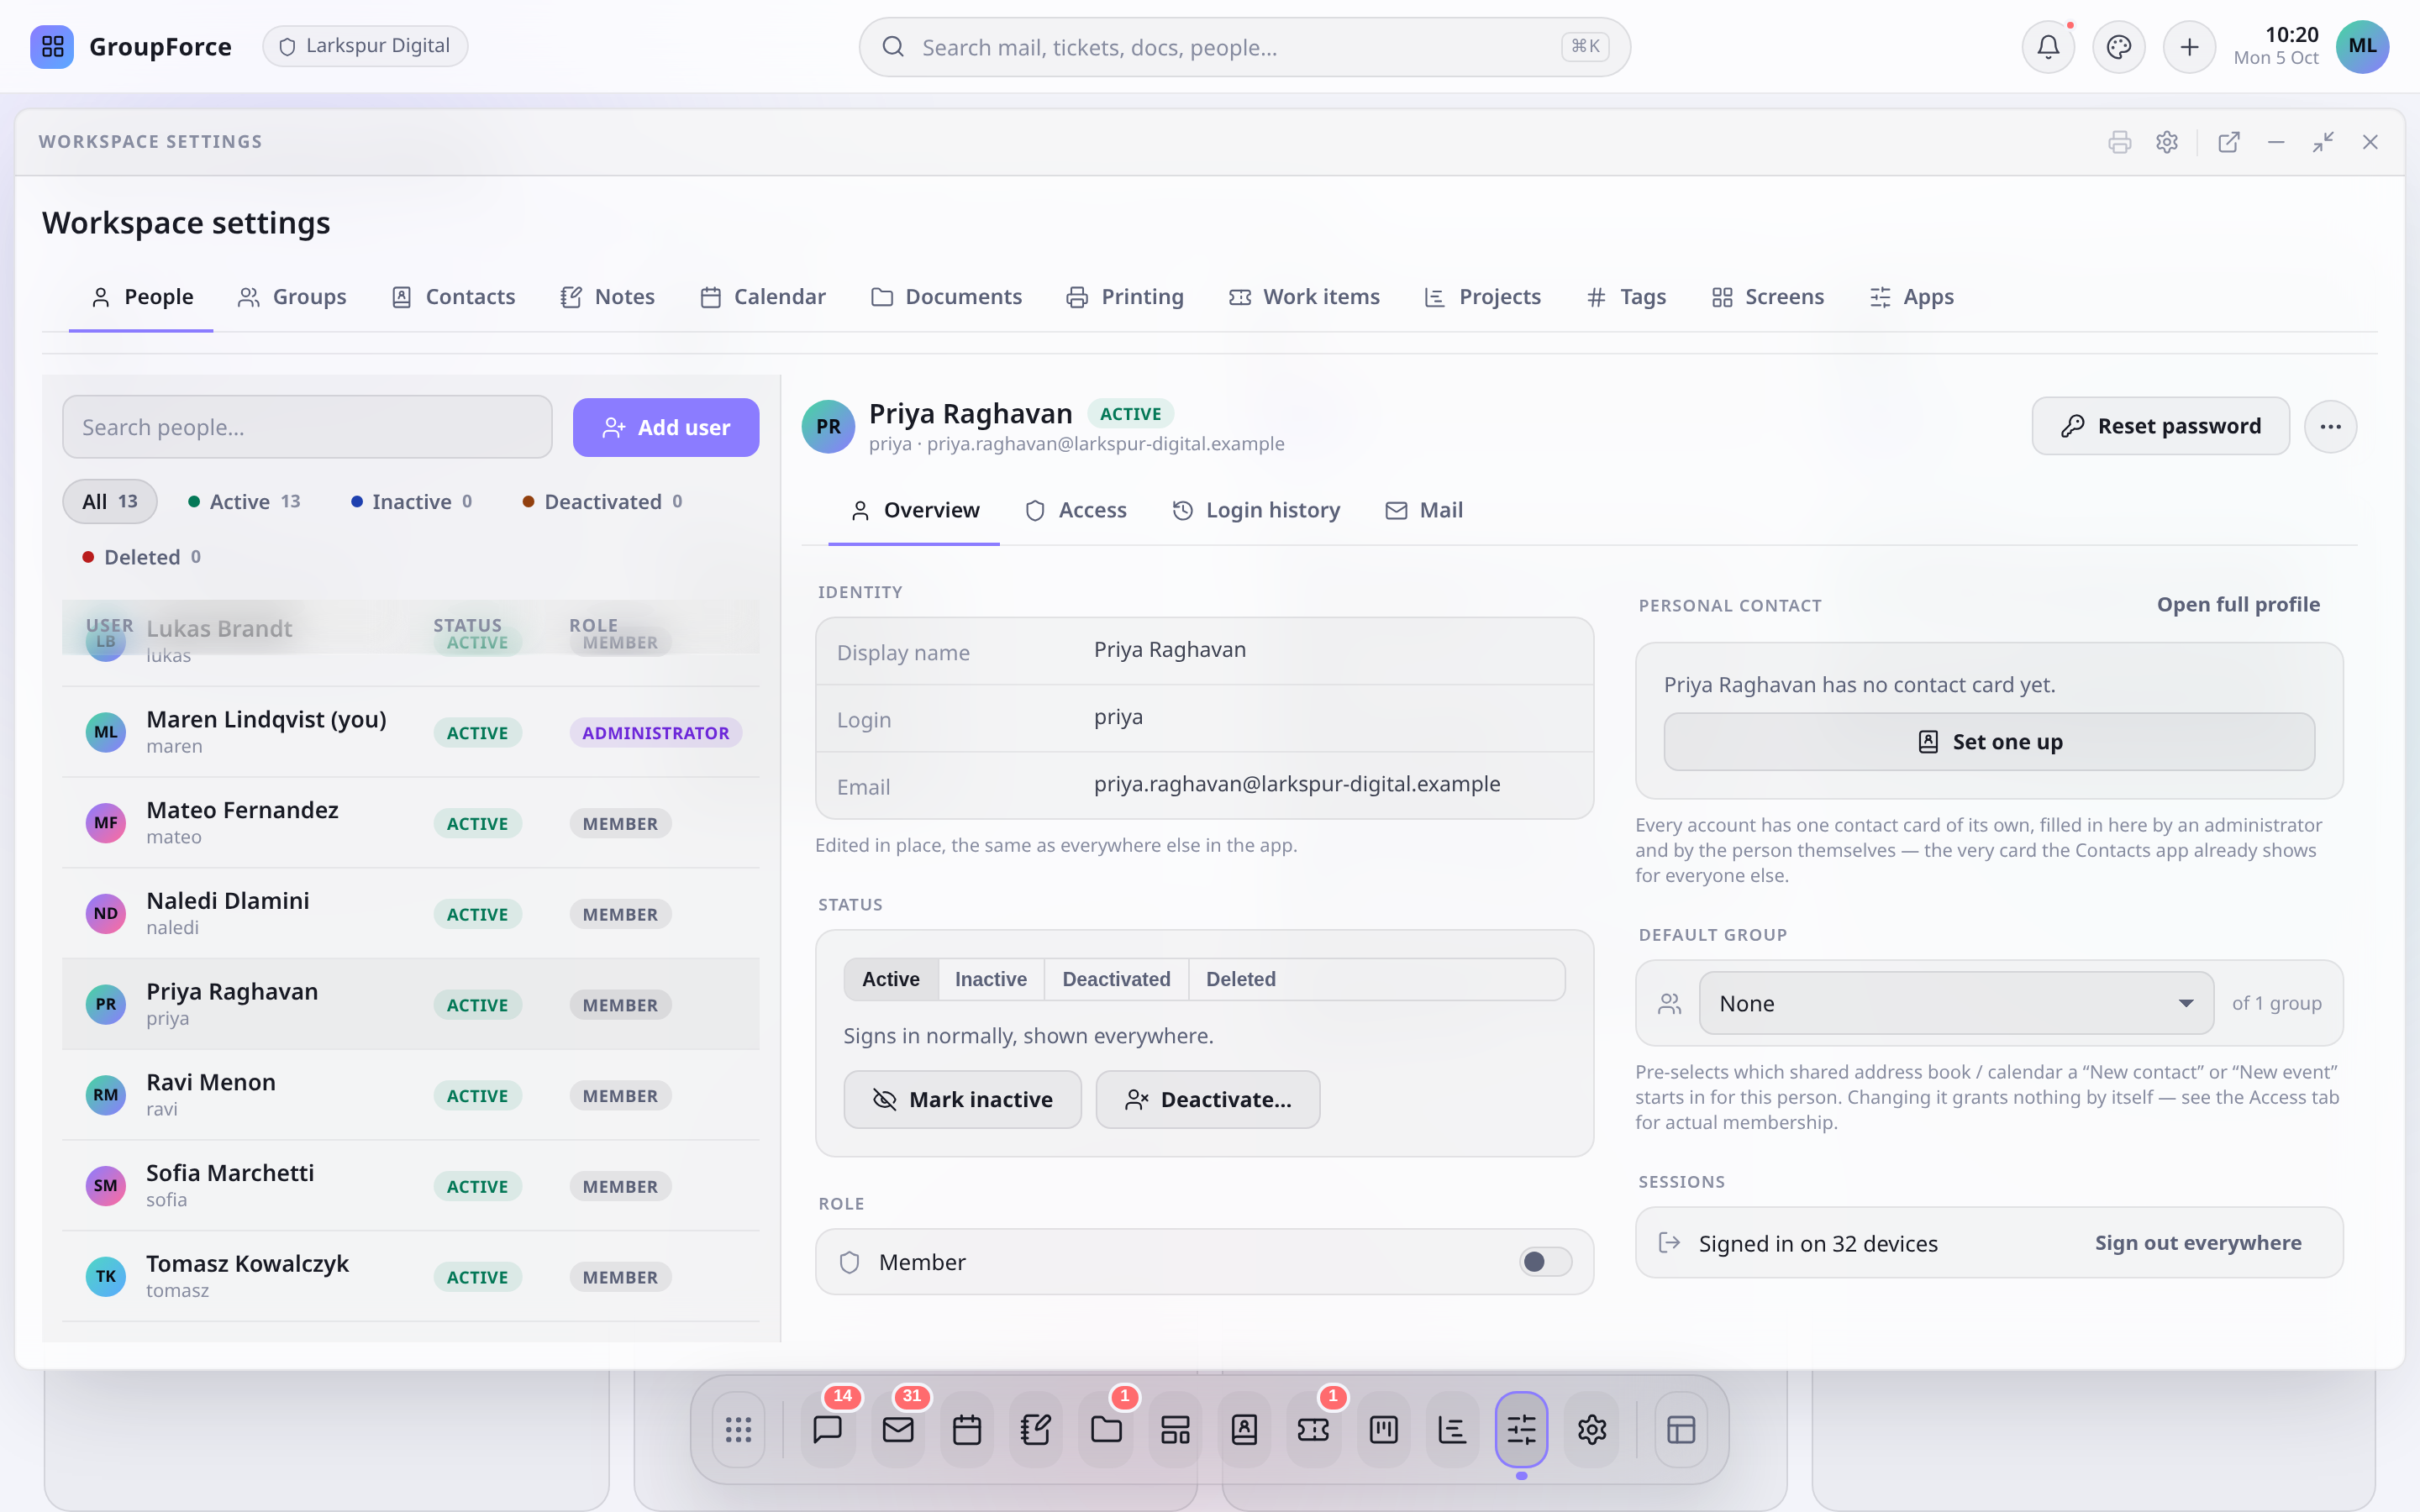
Select a person and open Overview. The Status card has four states, and the People list can be filtered by each one.
| Status | What it means | Takes a seat? |
|---|---|---|
| Active | Signs in normally and shows everywhere. | Yes |
| Inactive | Paused on purpose, for example a leave of absence. Cannot sign in. Still shown in the directory and in pickers, marked "Inactive". | No |
| Deactivated | Signed out everywhere at once and cannot sign in. Their records stay. Reactivate to undo it. | No |
| Deleted | A grace period before Purge. Shown only with the Deleted filter. Reactivate to undo, or Purge to finish. | No |
The buttons on the Status card are Mark inactive, Deactivate… and Reactivate. Delete… and Purge… are under the "more" menu and in the Danger zone. Delete is only offered for someone who is already inactive or deactivated, and Purge only for someone who is deleted. When you deactivate, mark inactive or delete someone, their sessions and tokens are revoked at once.
Purge is the end of the account. Its dialog lists what the person still owns and lets you pick a colleague under "Give what they owned to", or "Nobody — only purge if nothing is left". If something is left that cannot be given away, the purge is refused and the message names it. Also on Overview: Sign out everywhere (shown with "Signed in on N devices") ends all their browser sessions without changing their status, and a Default group setting chooses where their new contacts and events start.
Under Access, the Invisible switch hides someone from the directory and from @mention and people pickers, whatever their status. It is meant for shared-inbox or service accounts that stay active but should not clutter the lists.
7. Login history
The Login history tab on a person shows their latest 50 sign-in attempts, newest first, with the time, the IP address and the browser:
| Shown as | Means |
|---|---|
| Signed in | A successful sign-in. |
| Wrong password | The password did not match. |
| Account was inactive | The account could not sign in because it was not Active. |
The history is not a security log of strangers. An attempt with a login that matches no account is not recorded at all, and a wrong password on an account that is not Active is recorded as "Wrong password" rather than "Account was inactive". Repeated failures are also throttled for a while at the sign-in screen.
What's next
Once the first people are in, they sign in as described in the quick tour. To bring their mail, calendars and contacts across, continue with Moving your team over.